前言
尽量先把发布到本地的跑通,慢慢来。在操作本地maven仓库的发布可能会让你明白一下简单的机理,对后面发布到JCenter仓库会有帮助
环境
Android Studio 3.3
Android SDK 28
发布到本地
project/build.gradle
buildscript {
    repositories {
        google()
        jcenter()
    }
    dependencies {
        classpath 'com.android.tools.build:gradle:3.3.1'

        // NOTE: Do not place your application dependencies here; they belong
        // in the individual module build.gradle files
    }
}
library/gradle.properties
PROJ_NAME=localrepo
PROJ_ARTIFACTID=lib.test
LOCAL_REPO_URL=file:///Users/tanlin/mylibrary
library/build.gradle
apply plugin: 'com.android.library'
apply plugin: 'maven'
version = "0.1.0" // 后续的upload任务可以引用到这个变量
android {
    compileSdkVersion 28
    defaultConfig {
        minSdkVersion 23
        targetSdkVersion 28
        versionCode 1
        versionName "0.1.0" // 最好保持与version定义一致

        testInstrumentationRunner "android.support.test.runner.AndroidJUnitRunner"
    }

    buildTypes {
        release {
            minifyEnabled false
            proguardFiles getDefaultProguardFile('proguard-android-optimize.txt'), 'proguard-rules.pro'
        }
    }

}
// 上传任务
uploadArchives {
    repositories.mavenDeployer {
        // 读取当前目录下的 gradle.properties 配置文件
        repository(url: LOCAL_REPO_URL)
        pom.groupId = PROJ_GROUP
        pom.artifactId = PROJ_ARTIFACTID
        // 也可以读取android节点下的配置节点
        // pom.version = android.defaultConfig.versionName
        pom.version = version // 这个变量就是文件头定义的
    }
}

dependencies {
    implementation fileTree(dir: 'libs', include: ['*.jar'])

    implementation 'com.android.support:appcompat-v7:28.0.0'
    implementation 'com.android.support.constraint:constraint-layout:1.1.3'
    testImplementation 'junit:junit:4.12'
    androidTestImplementation 'com.android.support.test:runner:1.0.2'
    androidTestImplementation 'com.android.support.test.espresso:espresso-core:3.0.2'
}
引用本地库
project/build.gradle
allprojects {
    repositories {
        google()
        jcenter()
        maven {
            // libraby/build.gradle中的 LOCAL_REPO_URL 字段
            url 'file:///Users/tanlin/mylibrary'
        }
    }
}
app/build.gradle
dependencies {
    implementation fileTree(dir: 'libs', include: ['*.jar'])
    implementation 'com.android.support:appcompat-v7:28.0.0'
    implementation 'com.android.support.constraint:constraint-layout:1.1.3'
    // 规则,pro_group 对应 library/build.gradle 中的 PROJ_GROUP 字段
    // lib.test 对应 library/build.gradle 中的 PROJ_ARTIFACTID 字段
    // 0.1.0 对应 library/build.gradle 文件头的 version 字段
    implementation 'pro_group:lib.test:0.1.0'
    testImplementation 'junit:junit:4.12'
    androidTestImplementation 'com.android.support.test:runner:1.0.2'
    androidTestImplementation 'com.android.support.test.espresso:espresso-core:3.0.2'
}
发布到 JCenter
已经学会Android Studio 基本使用方法
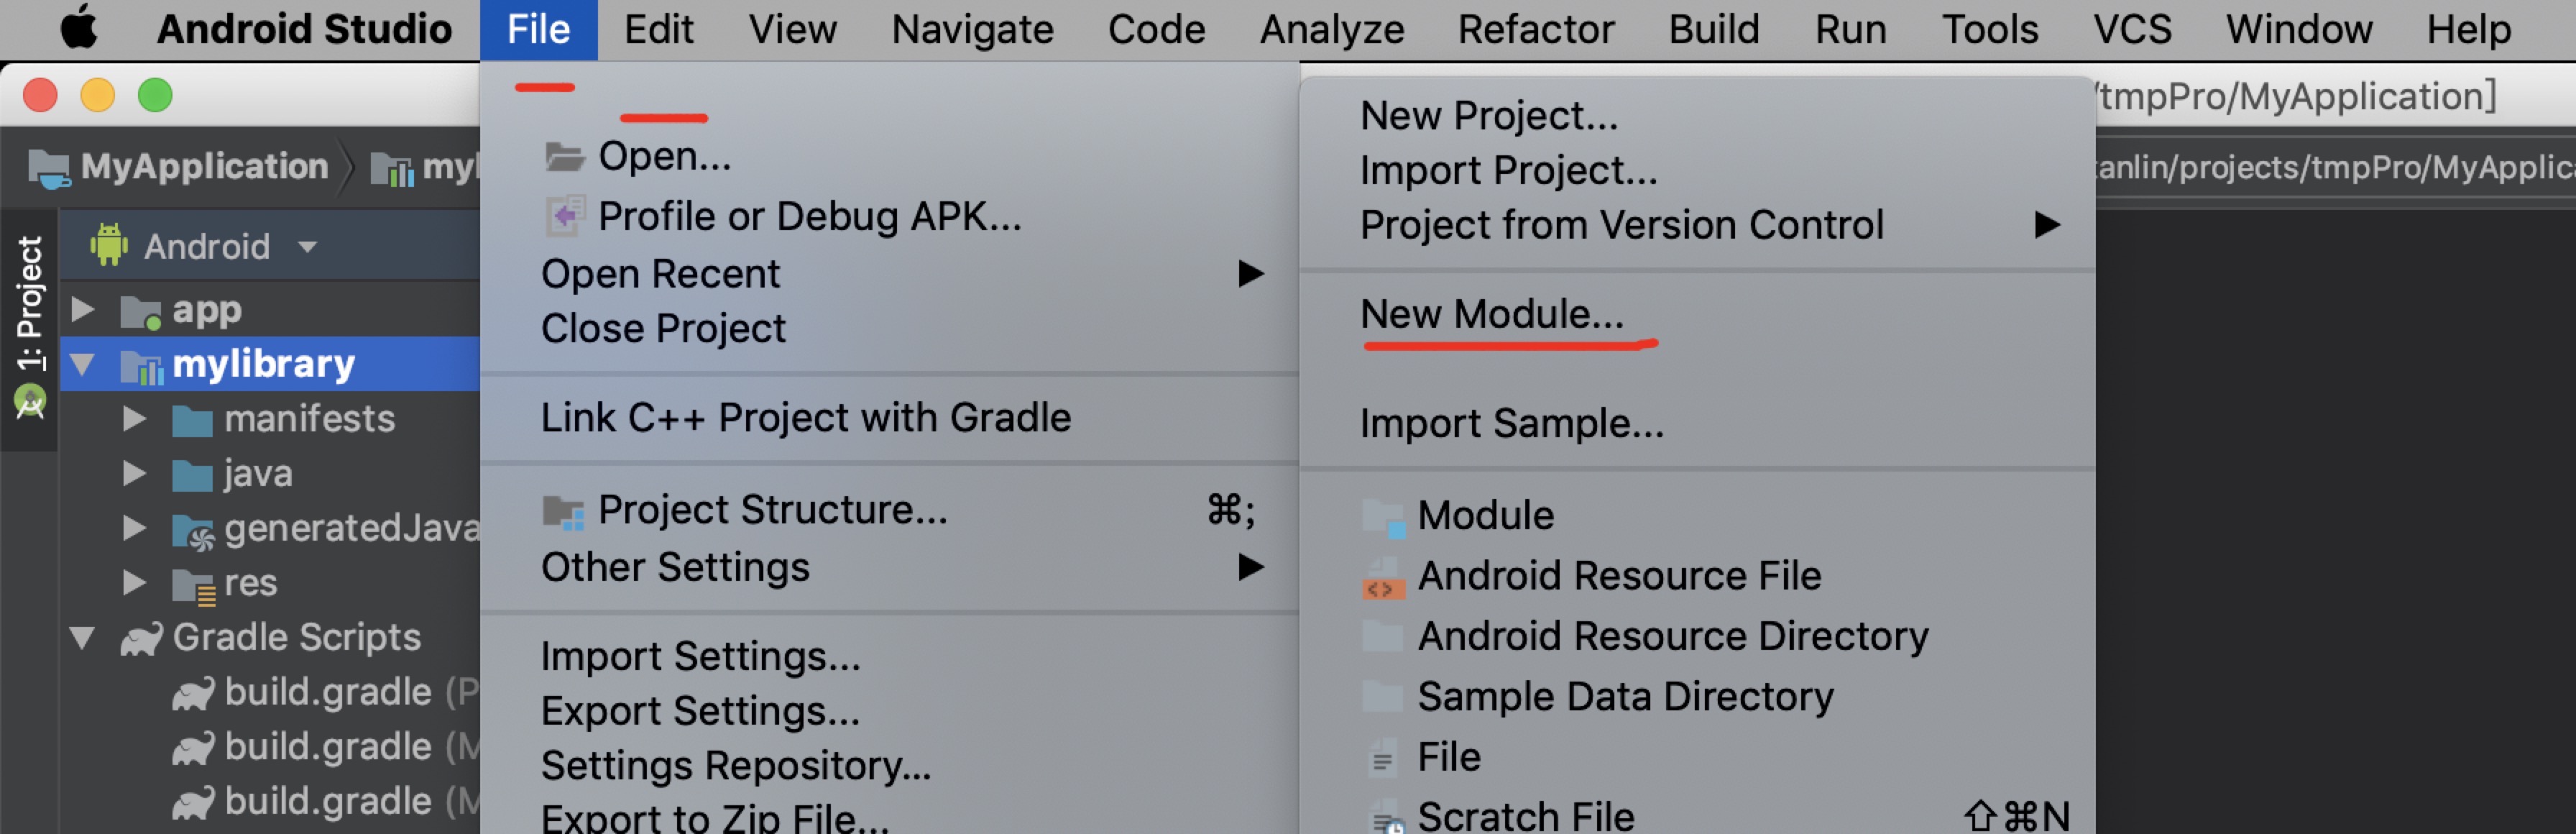
File -> New -> NewModule Android Library -> Next
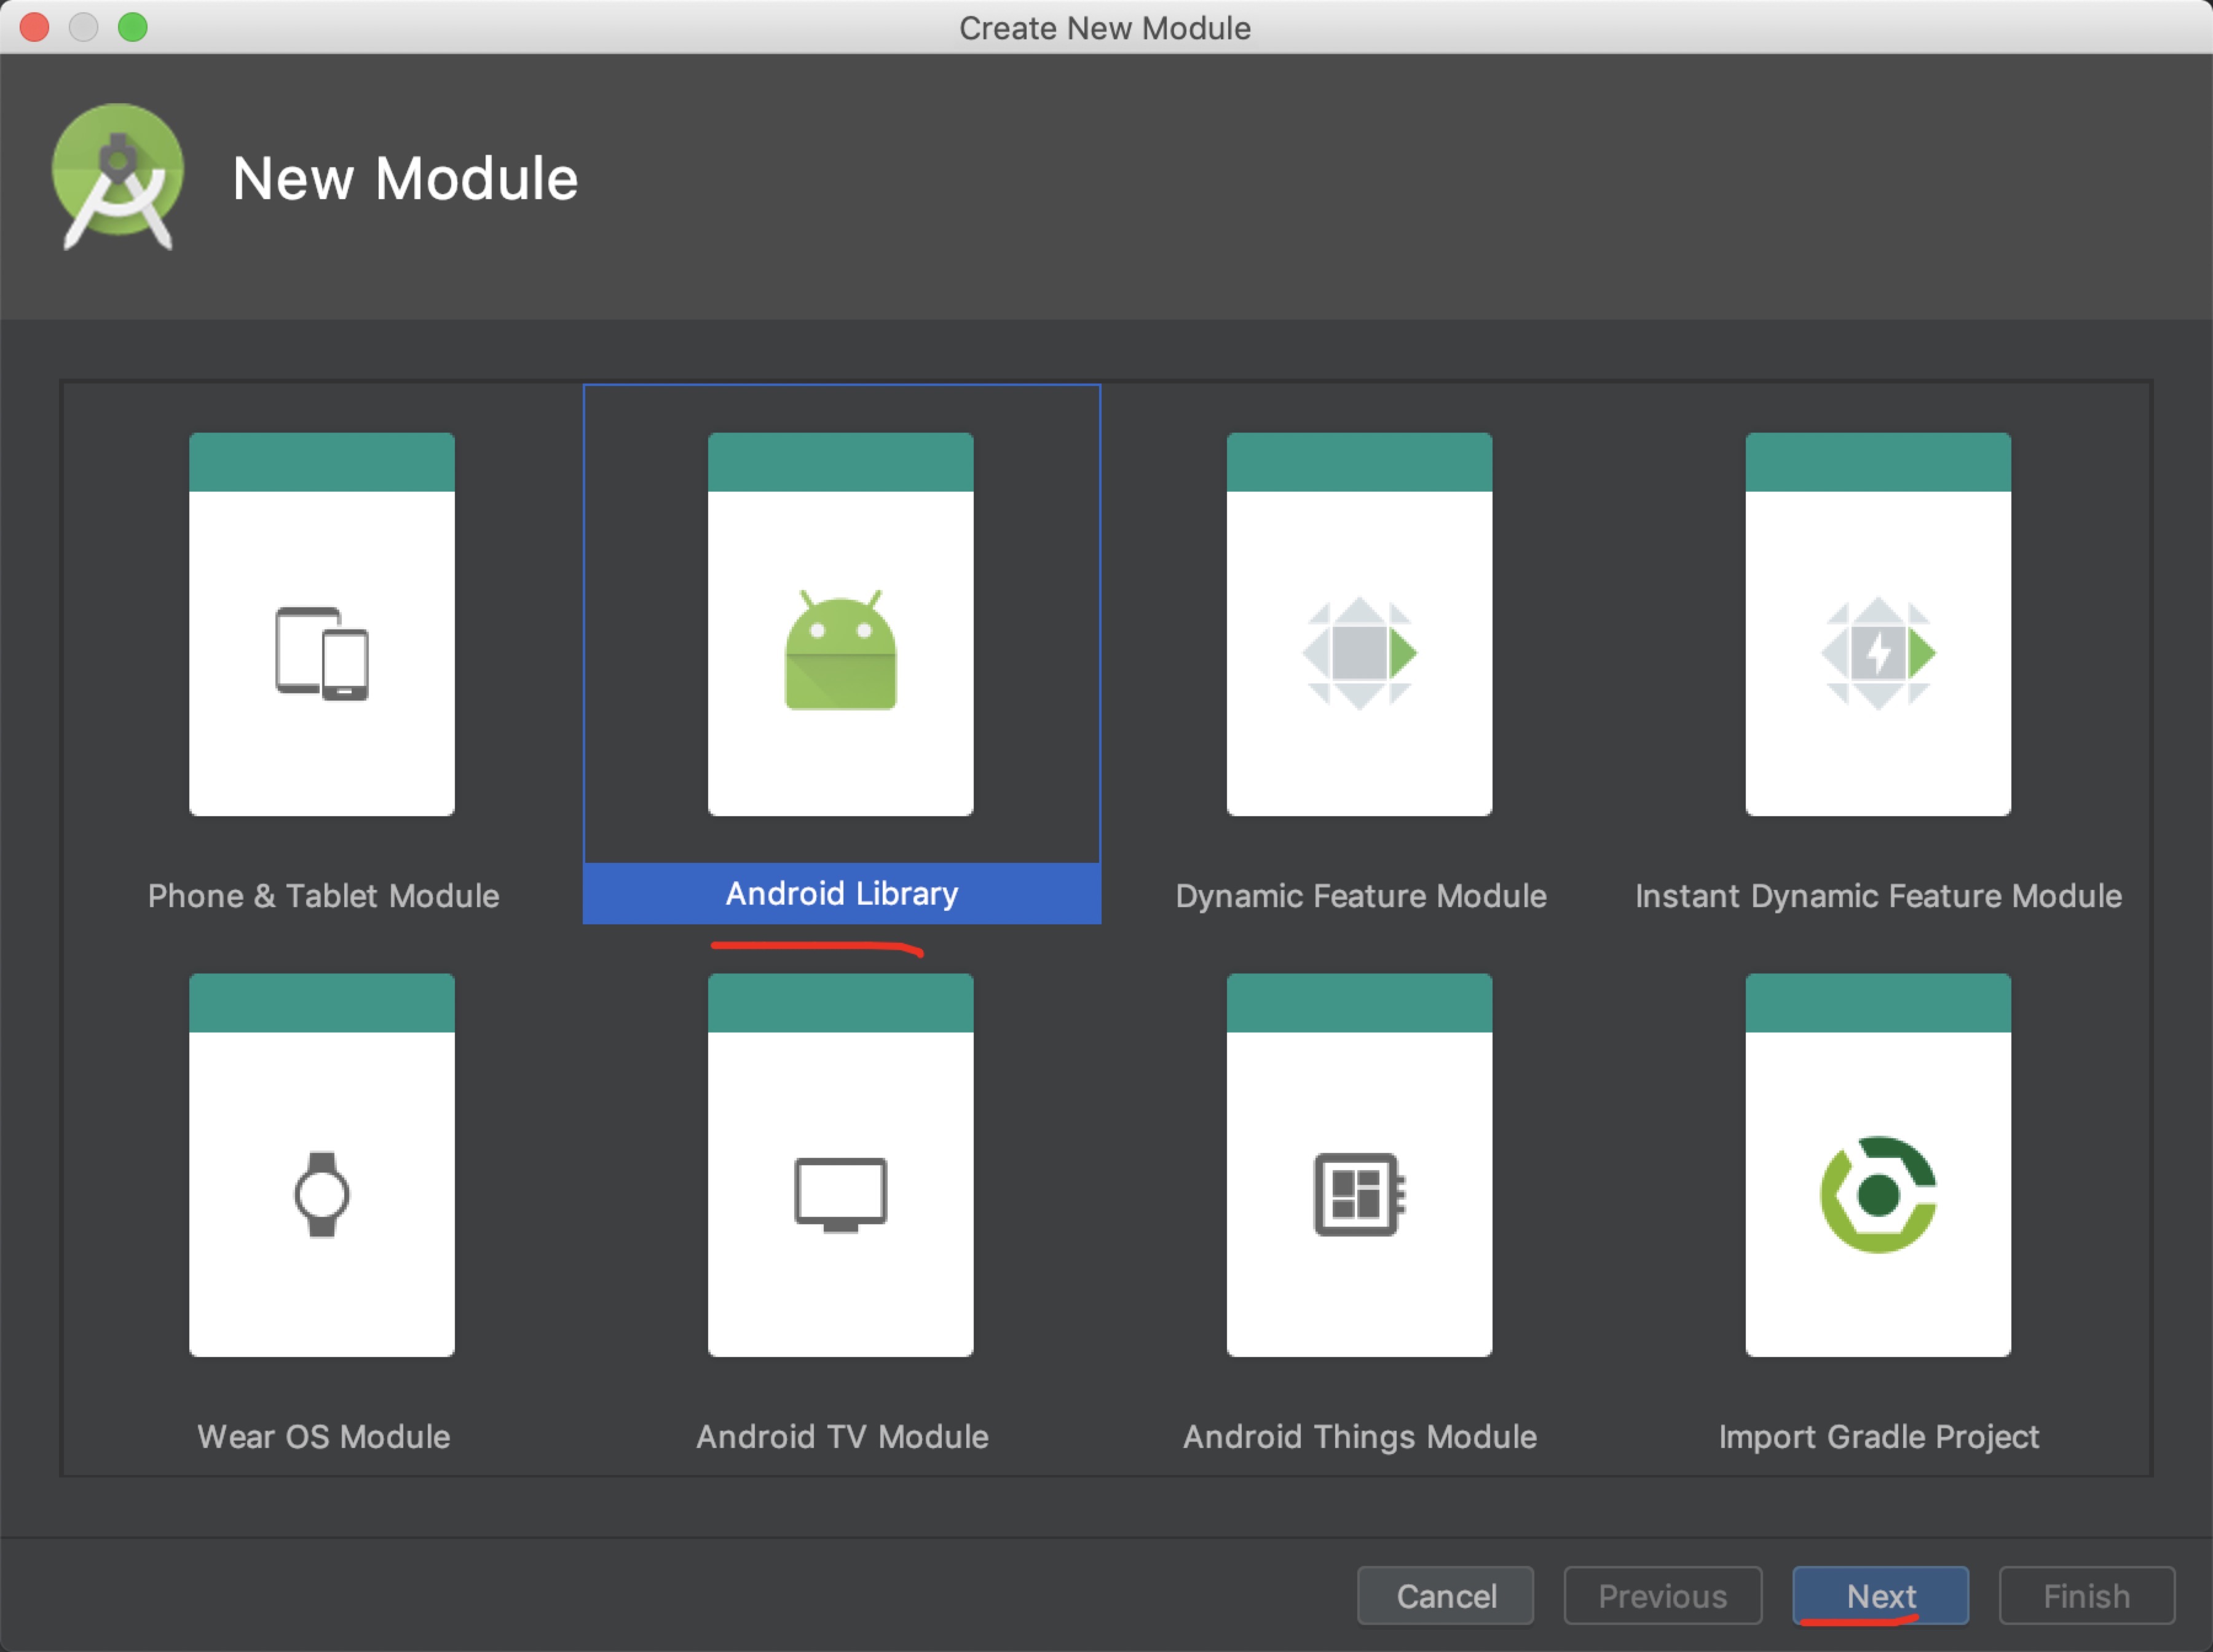
此时已经创建了Library
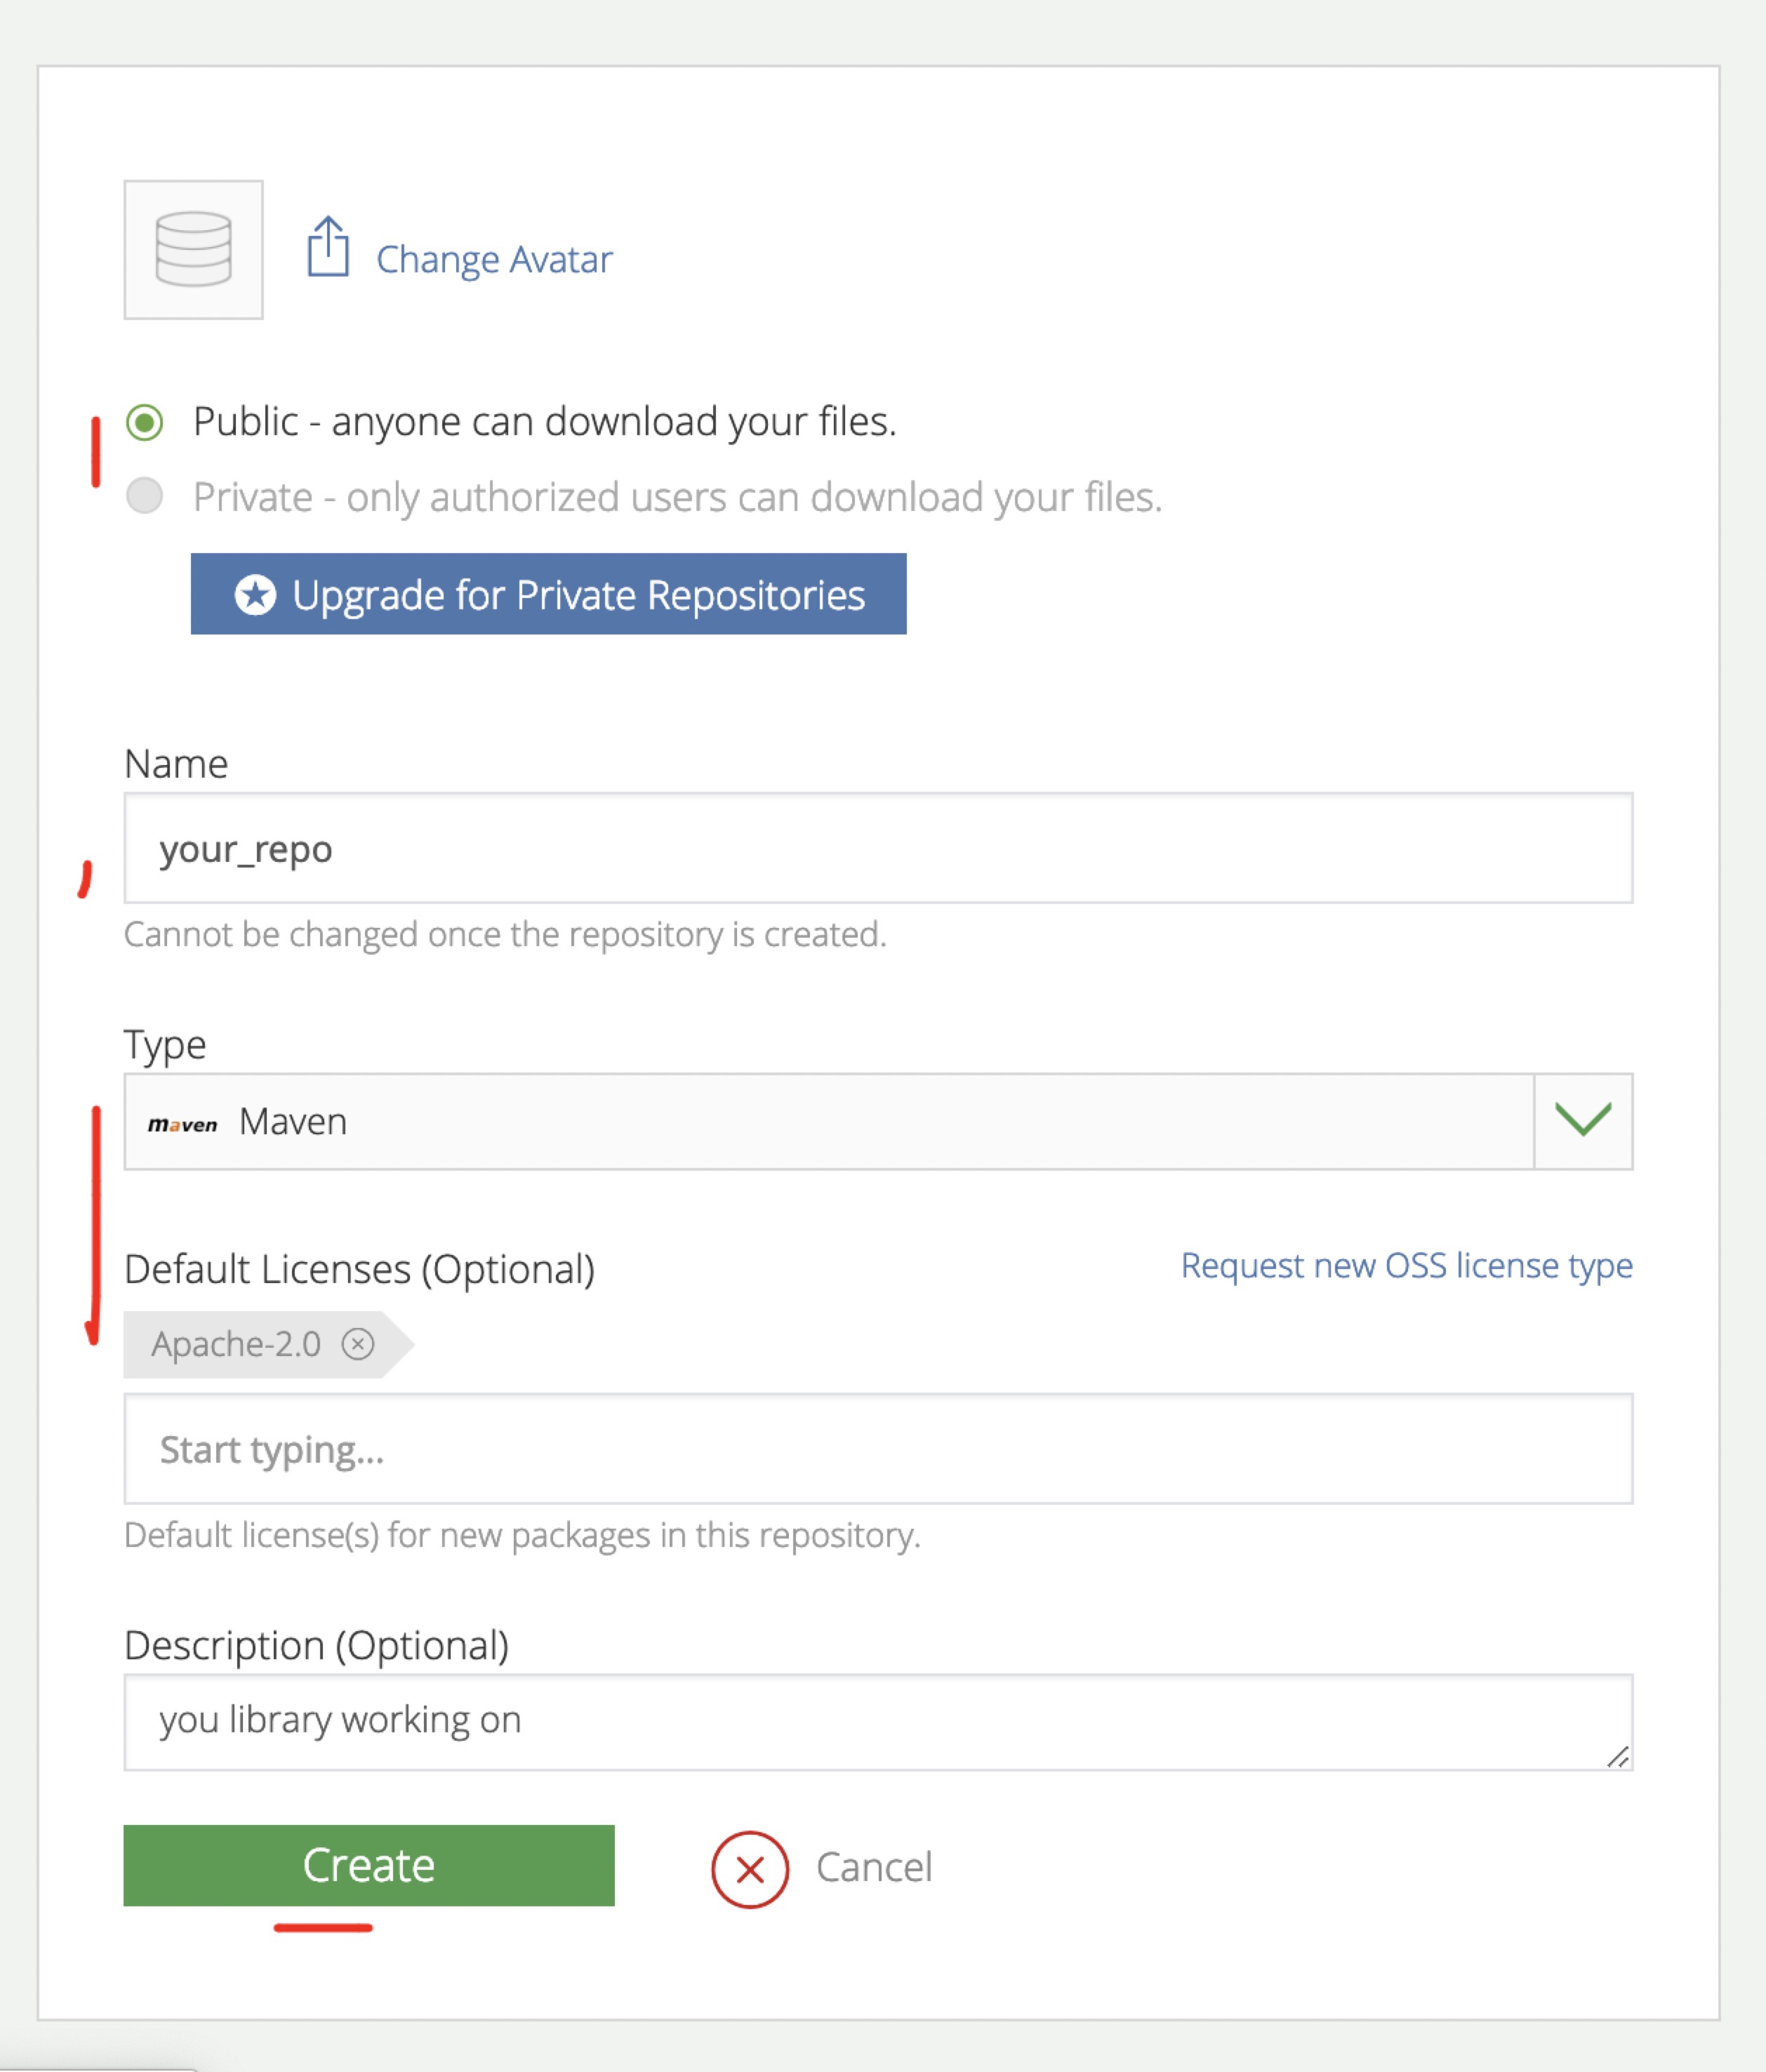
接下来,创建repo/package
在 bintray 上创建repo并在repo中创建package 需要注意的是,ext中配置要与创建的这个repo package 名称一致,否则上传不了的
// project/build.gradle
buildscript {
    repositories {
        google()
        jcenter()
    }
    dependencies {
        classpath 'com.android.tools.build:gradle:3.3.1'
        // bintray 插件
        classpath 'com.jfrog.bintray.gradle:gradle-bintray-plugin:1.7.3'
        // 发布需要的插件
        classpath 'com.github.dcendents:android-maven-gradle-plugin:2.0'

        // NOTE: Do not place your application dependencies here; they belong
        // in the individual module build.gradle files
    }
}
Medium 引用的两个文件
我down下来,放到rootProject里,让自己比较直观的清楚配置细节,再看
掘金-将 Gradle 项目发布到 maven 仓库 这篇文章的时候,才不会觉得云里雾里,
那个地方改写啥,这个配置项加载什么地方不得而知,比较苦恼。我自己看了下apply的内容,发现其实就是两个gradle任务文件而已。然后对照文章
慢慢看配置项。虽然表明是v1但是没找到v2的文件,嘿嘿。呐,源文件在这里:
github-installv1
github-bintrayv1
install gradle 文件
// project/install.gradle
// require publishedGroupId, artifact
// require libraryName, libraryDescription
// require licenseName, licenseUrl
// require developerId, developName, developEmail
// require scm gitUrl, siteUrl

apply plugin: 'com.github.dcendents.android-maven'
group = publishedGroupId // Maven Group ID for the artifact
install {
    repositories.mavenInstaller {
        // This generates POM.xml with proper parameters
        pom {
            project {
                packaging 'aar'
                groupId publishedGroupId
                artifactId artifact

                // Add your description here
                name libraryName
                description libraryDescription
                url siteUrl

                // Set your license
                licenses {
                    license {
                        name licenseName
                        url licenseUrl
                    }
                }
                developers {
                    developer {
                        id developerId
                        name developerName
                        email developerEmail
                    }
                }
                scm {
                    connection gitUrl
                    developerConnection gitUrl
                    url siteUrl

                }
            }
        }
    }
}
upload gradle 文件
// project/upload.gradle
// require version bintrayRepo, bintrayName
// require pkg gitUrl, siteUrl
// require libraryDescription
// require allLicenses

apply plugin: 'com.jfrog.bintray'
version = libraryVersion
if (project.hasProperty("android")) { // Android libraries
    task sourcesJar(type: Jar) {
        classifier = 'sources'
        from android.sourceSets.main.java.srcDirs
    }
    task javadoc(type: Javadoc) {
        source = android.sourceSets.main.java.srcDirs
        classpath += project.files(android.getBootClasspath().join(File.pathSeparator))
    }
} else { // Java libraries
    task sourcesJar(type: Jar, dependsOn: classes) {
        classifier = 'sources'
        from sourceSets.main.allSource
    }
}
//添加UTF-8编码否则注释可能JAVADOC文档可能生成不了
//放在 javadocJar task 的上方
javadoc {
    options{
        encoding "UTF-8"
        charSet 'UTF-8'
        author true
        version true
        links "http://docs.oracle.com/javase/7/docs/api"
        title "swipeJavaDoc"
    }
}

task javadocJar(type: Jar, dependsOn: javadoc) {
    classifier = 'javadoc'
    from javadoc.destinationDir
}

artifacts {
    archives javadocJar
    archives sourcesJar
}

// Bintray
Properties properties = new Properties()
properties.load(project.rootProject.file('local.properties').newDataInputStream())
bintray {
    user = properties.getProperty("bintray.user")
    key = properties.getProperty("bintray.apikey")
    configurations = ['archives']
    pkg {
        repo = bintrayRepo
        name = bintrayName
        desc = libraryDescription
        websiteUrl = siteUrl
        vcsUrl = gitUrl
        licenses = allLicenses
        publish = true
        publicDownloadNumbers = true
        version {
            desc = libraryDescription
            gpg {
                sign = true //Determines whether to GPG sign the files. The default is false
                passphrase = properties.getProperty("bintray.gpg.password")
                //Optional. The passphrase for GPG signing'
            }
        }
    }
}
// myLibrary/build.gradle
apply plugin: 'com.android.library'
android {}
ext {
bintrayRepo = 'repo' //this is the repository name on the bintray site
bintrayName = 'lib.test'//this is the package name on the bintray site,
// so if this package already exists then it will take that but if it doesnt
// exist then it will craete the package with the name in the above repository
publishedGroupId = 'pro_group'
artifact = 'lib.test'
libraryVersion = '0.1.0' // publishedGroupId:artifact:libraryVersion
libraryName = 'mylibrary' //libraryname, artifact must be same as the library module name
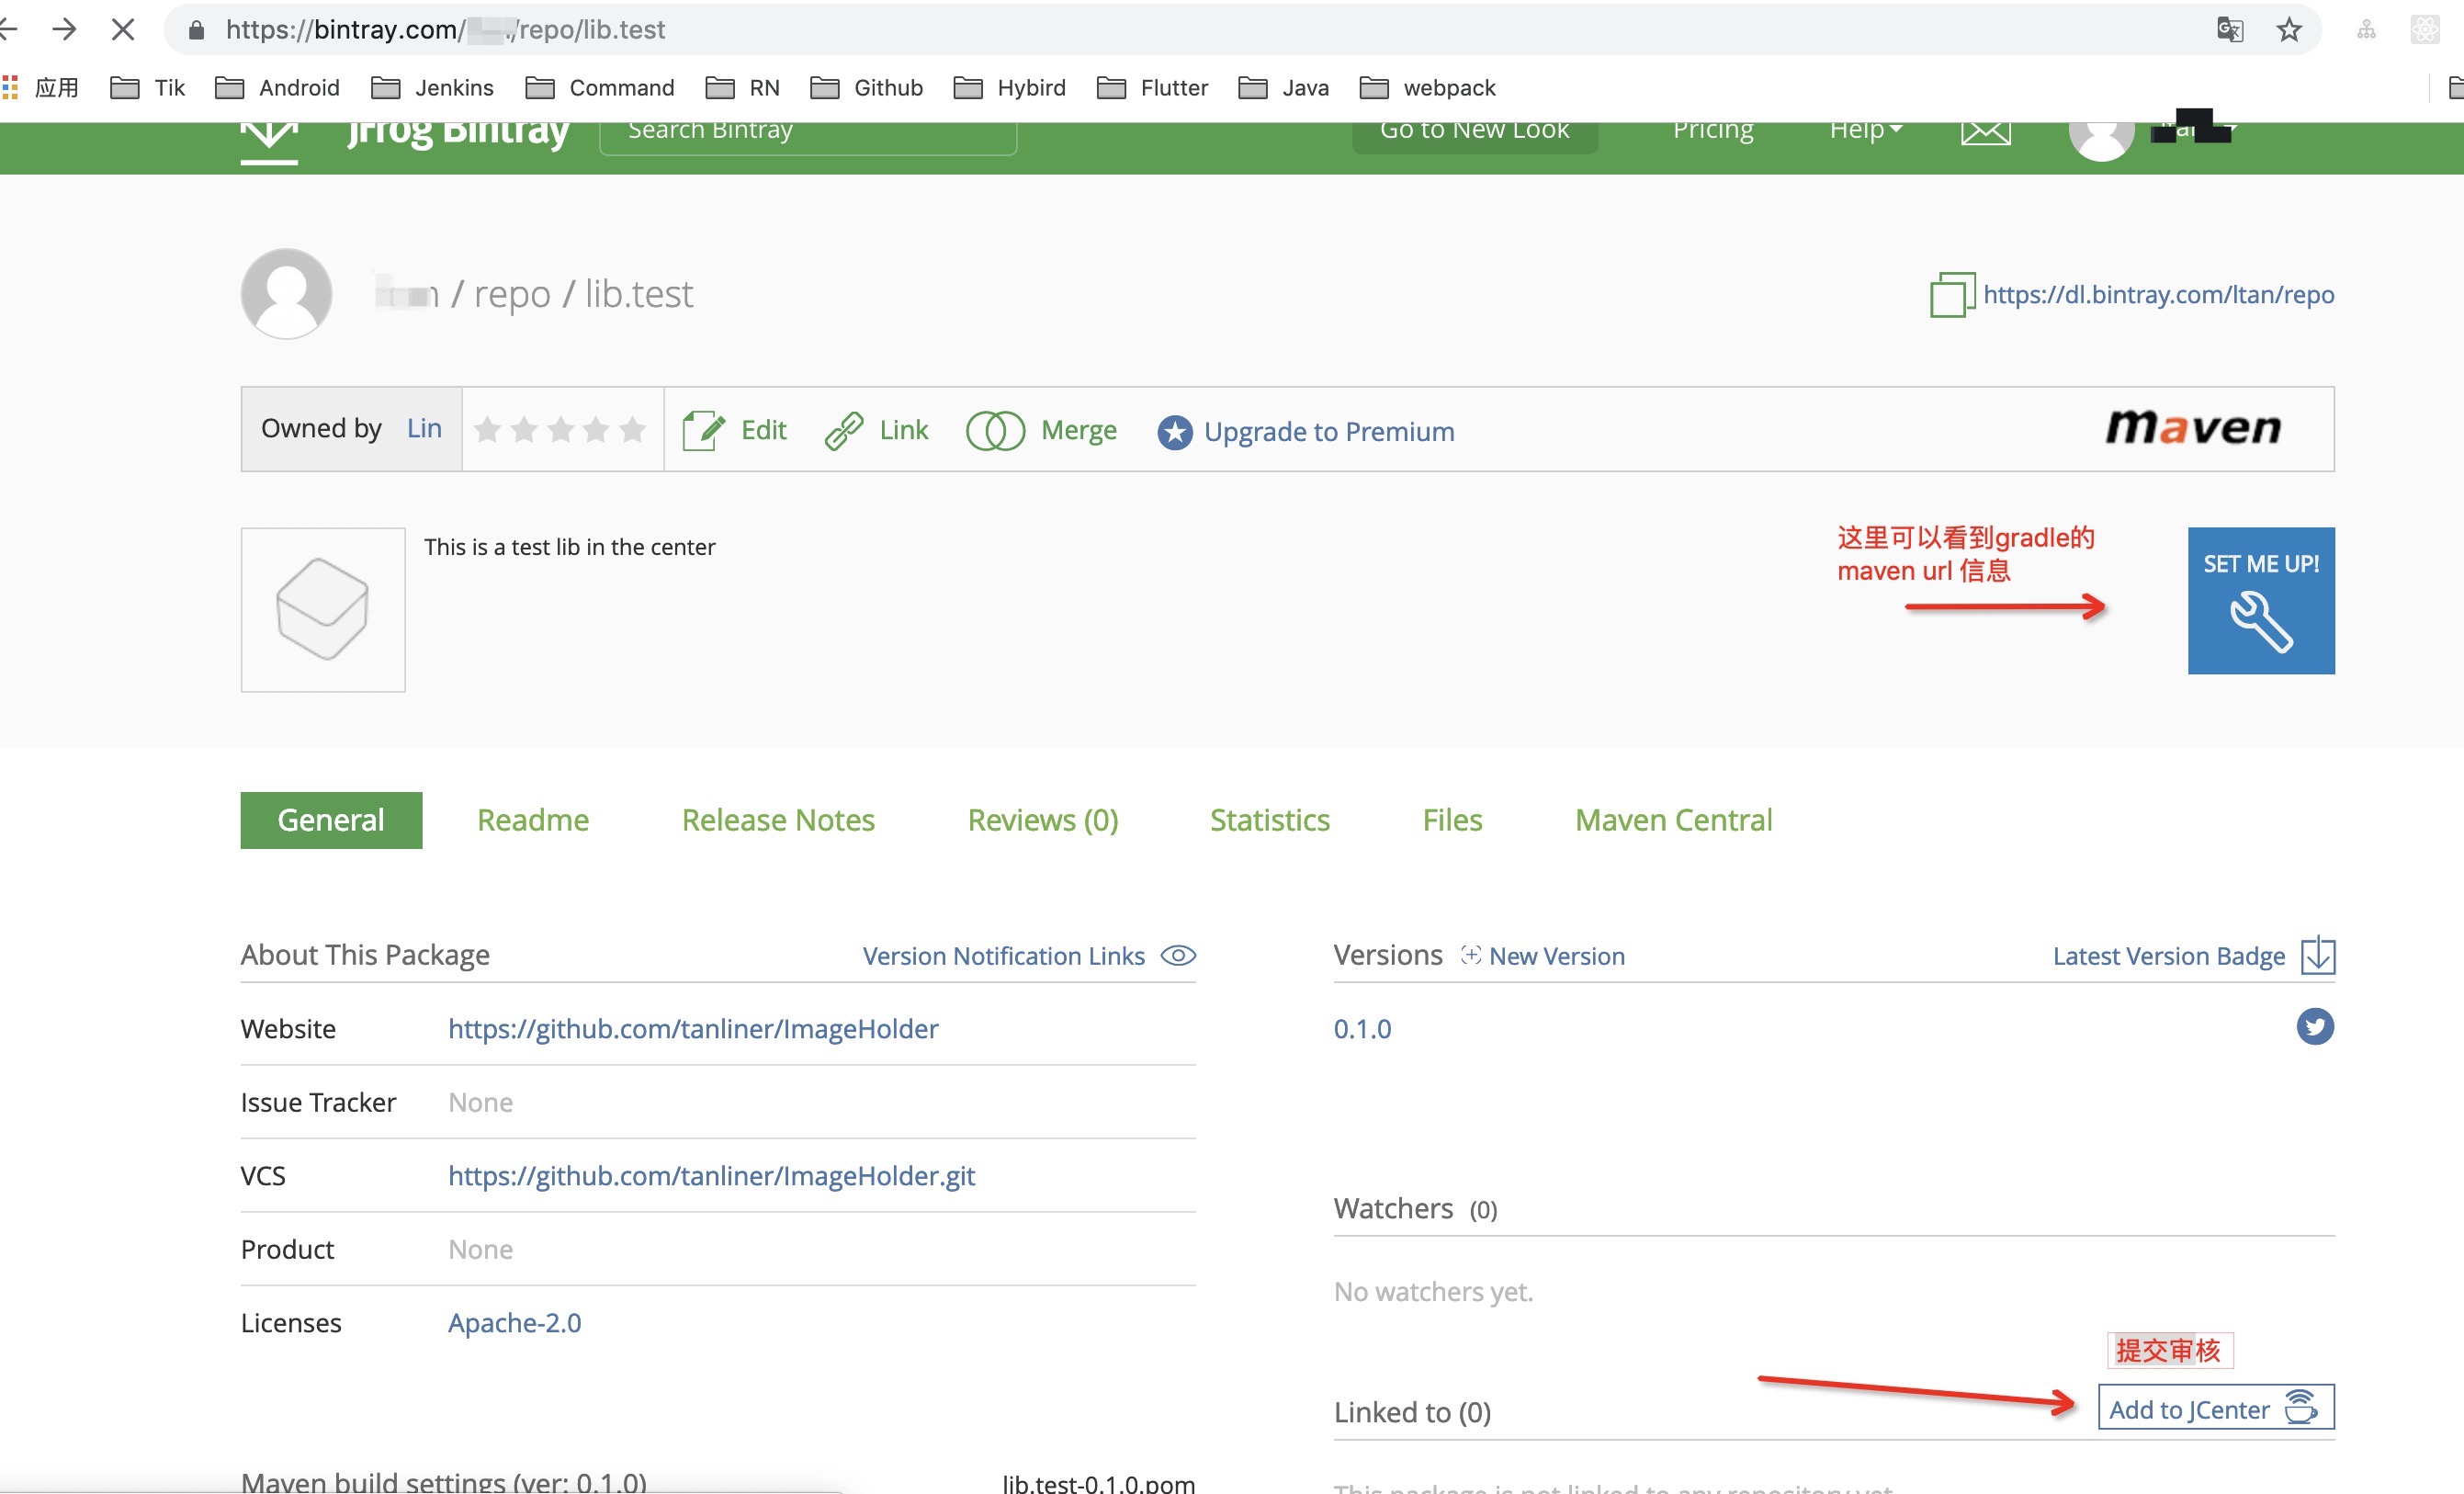
libraryDescription = 'This is a test lib in the center'
// github url & git repo
siteUrl = 'https://github.com/tanliner/ImageHolder'
gitUrl = 'https://github.com/tanliner/ImageHolder.git'
// developer config
developerId = 'ltan' // jenter show idname
developerName = 'Lin Tan' // actually name
developerEmail = 'lintan.spring@gmail.com'
// license
licenseName = 'The Apache Software License, Version 2.0'
licenseUrl = 'http://www.apache.org/licenses/LICENSE-2.0.txt'
allLicenses = ["Apache-2.0"]
}
dependencies {}
apply from: '../install.gradle'
apply from: '../upload.gradle' // 或者用下面的方式,直接引用网络文件
// apply from: 'https://raw.githubusercontent.com/nuuneoi/JCenter/master/installv1.gradle'
// apply from: 'https://raw.githubusercontent.com/nuuneoi/JCenter/master/bintrayv1.gradle'
注意这里有坑
此时,如果刚做完本地发布,接着做发布到JCenter,发现Build会失败,是因为本地任务和远端任务可能因为某些配置项冲突了,什么配置没做深究。
将本地上传任务的 uploadArchives 任务注释掉即可
报错信息如下
ERROR: Unable to find method 'org.gradle.api.internal.artifacts.ivyservice.projectmodule.DefaultProjectPublication.<init>(Lorg/gradle/api/artifacts/ModuleVersionIdentifier;)V'.
Possible causes for this unexpected error include:
Gradle's dependency cache may be corrupt (this sometimes occurs after a network connection timeout.)
Re-download dependencies and sync project (requires network)

The state of a Gradle build process (daemon) may be corrupt. Stopping all Gradle daemons may solve this problem.
Stop Gradle build processes (requires restart)

Your project may be using a third-party plugin which is not compatible with the other plugins in the project or the version of Gradle requested by the project.

In the case of corrupt Gradle processes, you can also try closing the IDE and then killing all Java processes.
上传到 JCenter
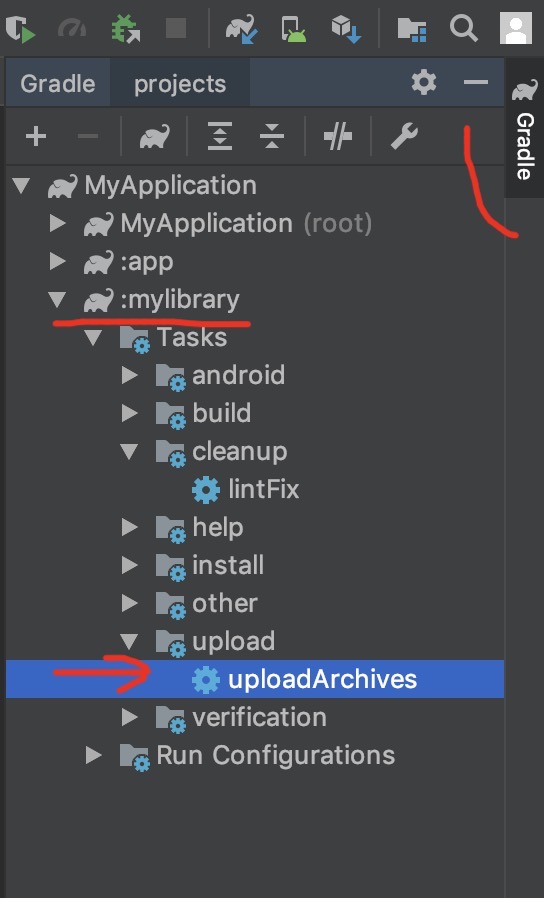
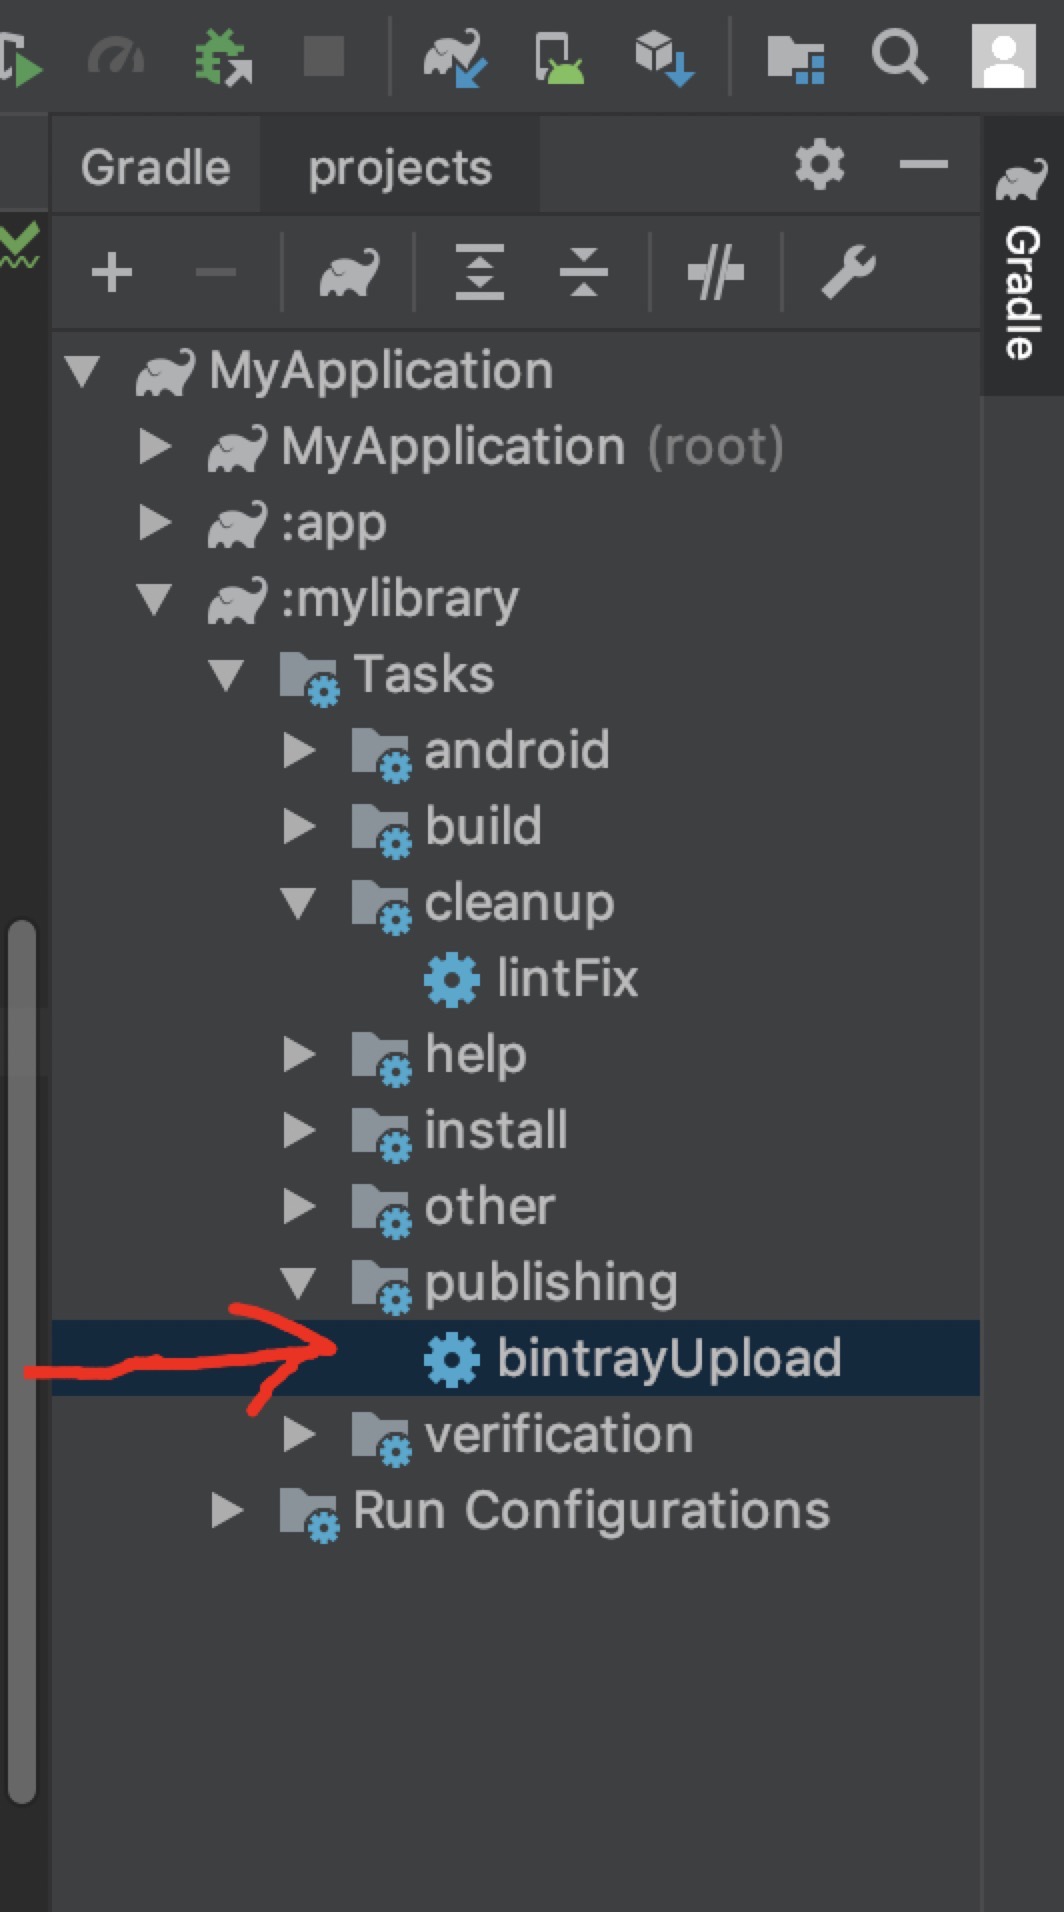
展开工具栏,找到library的gradle任务然后,双击bintrayUpload就好了,可能有点久。不用 VPN 或许会快些。如下图
目前其他人还不能直接使用这个库,需要在bintray提交审核申请,待通过后其他人才能使用。使用方式就比较简单
// compile 'pro_group:lib.test:0.1.0' // 低版本的AS可能还是compile这种写法
implementation 'pro_group:lib.test:0.1.0'